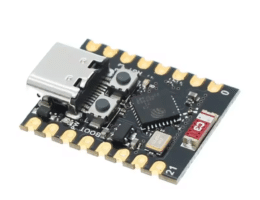
What can be more annoying than coming back home at night and your lights do not turn on automatically? Or your plants dying because the automated water system didn’t work. Well, this can happen if you are running Home Assistant on a RaspberryPi and it hangs for whatever reason.
In this tutorial I will show you how to use the watchdog timer to keep your RaspberryPi running continuously and auto recover when the system hangs.
What is watchdog timer (WDT) ?
A watchdog timer is a hardware mechanism that resets a device if it gets stuck due to software or hardware issues. Since it is implemented at the hardware level, it will work properly even if the kernel crashes. It can be very useful when you do not have physical access to the device to reset it manually.
The way the watchdog timer works is very simple. It is basically a counter that increases for each CPU cycle. When the counter overflows (all bits 1), the device resets automatically. To prevent the counter to overflow we just have to reset it at regular times. Also, if we want to hard reset the device, we overflow the counter.
You can read some interesting stories about the importance of WDT’s in space missions and what could possibly go wrong here.
Setting WDT on RaspberryPi
Luckily, all RaspberryPi’s come with hardware WDT and enabling it is not too difficult. There are many outdated tutorials online about how to set it up, so I will try to cover it an up to date version.
Check WDT module is enabled in kernel
In many tutorials you will find that you have to enable bcm2835_wdt or bcm2708_wdog modules using modprobe. Firstly, bcm2708_wdog is the old module that was replaced by bcm2835_wdt. Secondly, this module comes precompiled into kernel directly, so it doesn’t have to be enabled manually anymore and also it will not show when running lsmod. To check if you have this module precompiled in kernel, you can run:
pi@raspberrypi:~ $ sudo cat /lib/modules/$(uname -r)/modules.builtin | grep wdt
kernel/drivers/watchdog/bcm2835_wdt.ko
pi@raspberrypi:~ $ sudo cat /var/log/kern.log* | grep watchdog
Jan 31 02:17:02 raspberrypi kernel: bcm2835-wdt bcm2835-wdt: Broadcom BCM2835 watchdog timer
The first command checks if the module is compiled into the kernel and the second command checks if it is loaded at boot.
Installing and enabling WDT service
To enable watchdog you have to change the boot parameters by adding dtparam=watchdog=on in /boot/config.txt. Also, install watchdog package and enable it to start at startup. Don’t forget to restart your RaspberryPi for these settings to come into effect.
pi@raspberrypi:~ $ sudo apt install watchdog
[... output ...]
pi@raspberrypi:~ $ sudo systemctl enable watchdog
[... output ...]
Configure WDT service
The configuration file for watchdog can be found in /etc/watchdog.conf. You can read the documentation for each setting in the file and adjust it as you like. However, I recommend the following:
max-load-1 = 24
watchdog-device = /dev/watchdog
realtime = yes
priority = 1
Test WDT service
You can test the WDT working as expecting by simulating heavy load on your device. The following command runs a fork bomb and should create enough load for WDT to overflow. DANGER: THIS WILL REBOOT YOUR DEVICE.
:(){ :|: & };:
If you check /var/log/syslog after reboot, you should see something like this:
Feb  5 18:35:13 raspberrypi watchdog[720]: loadavg 31 6 2 is higher than the given threshold 24 18 12!
Feb  5 18:35:13 raspberrypi watchdog[720]: shutting down the system because of error 253 = 'load average too high'


My system is continuously rebooting after the fork bomb. What can I do to prevent it?
I would think you set max-load-1 too low
On RPI-400 (Raspian GNU/Linux 10 (buster): When the system boots back up the wireless device is not found. Rebooting with ctl-alt-del does not have this issue.