

Anycubic i3 mega S is one of the popular low end 3D printers that provide a good performance price ratio. It is easy to install, very user friendly and works out of the box without too much configuration. The Anycubic i3 mega S is ideal as a first 3D printer and I highly recommend it.
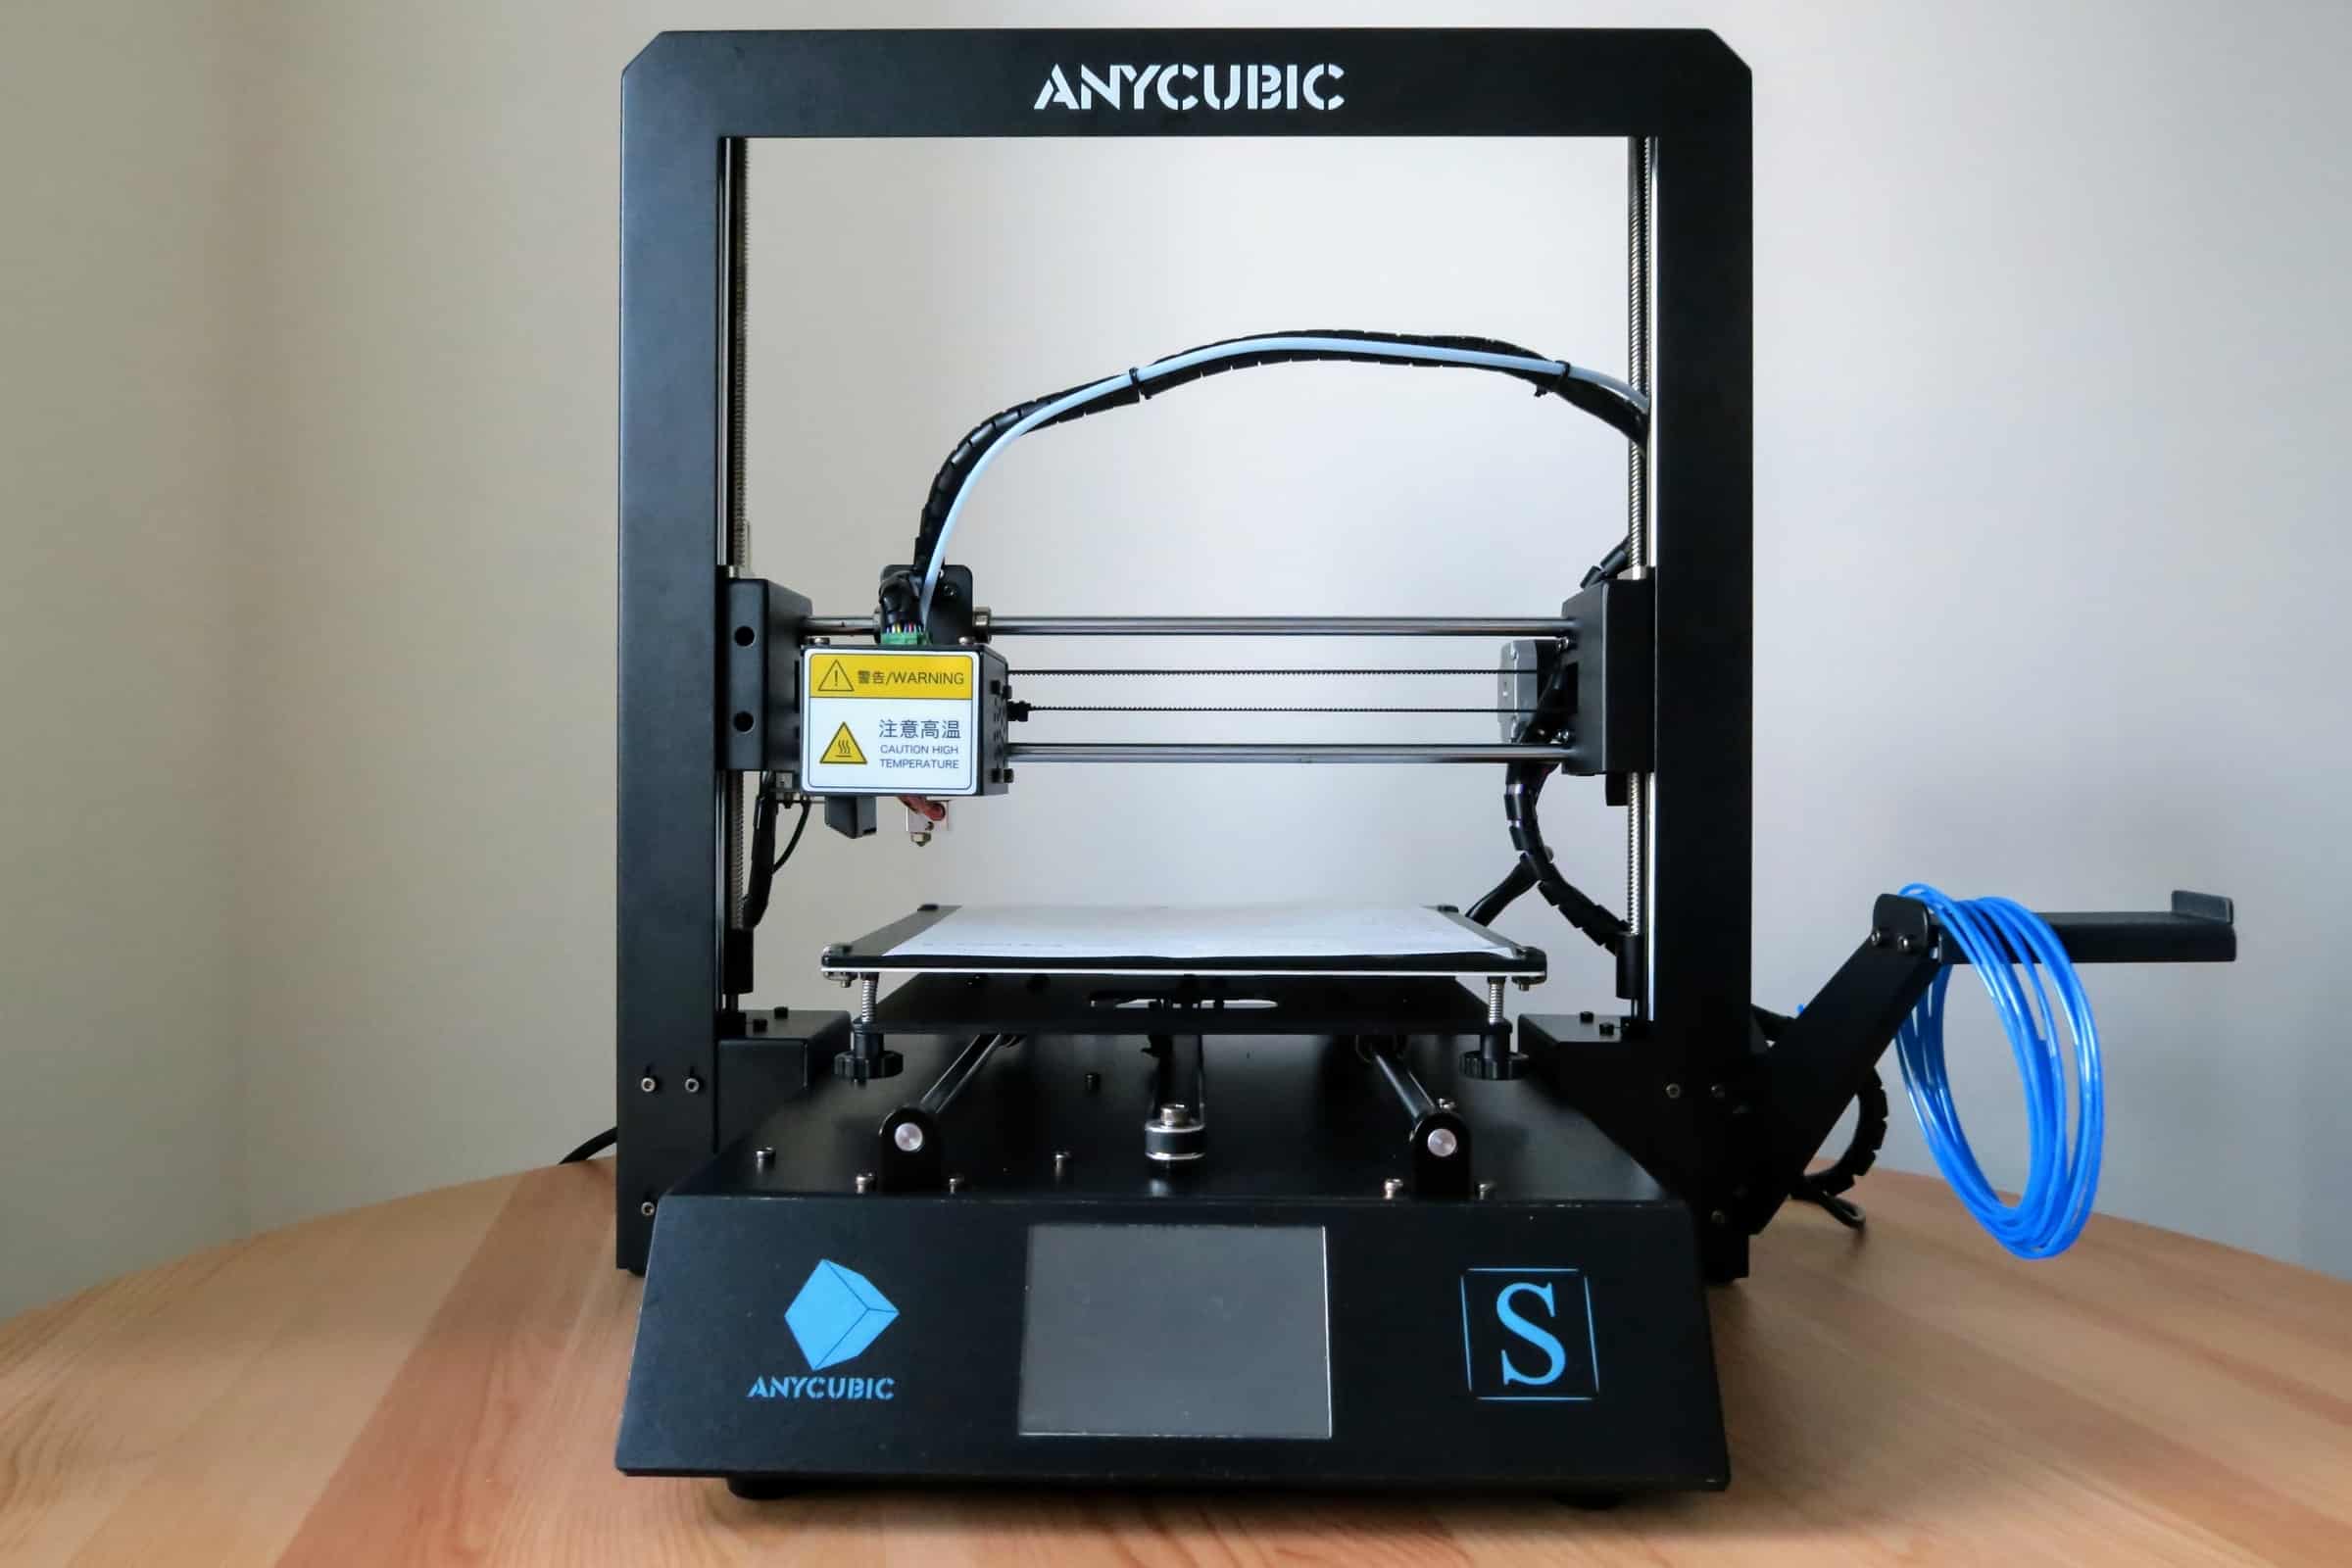
The i3 mega S it is the updated version of the older i3 mega printer launched a few years ago. The biggest change is probably the filament holder. Other than the i3 Mega S, Anycubic has a few other printers to cover other segments of the marked. The prices start from around 180$ for the Photon Zero and Mega Zero to about 400$ for Chiron. The price seems to be directly proportional with the printing area.
Anycubic i3 Mega S Technical Specifications
- Printing Technology: FDM (Fused Deposition Modeling)
- Large build volume: 210 x 210 x 205 mm
- Positioning Accuracy: X/Y 0.0125mm Z 0.002mm
- Supported Print Materials: TPU, PLA, ABS, HIPS, Wood
- Full Rigid Solid metal frame construction and superior stability
- High quality, accurate printing with layer resolution down to 50 microns
- Ultrabase for excellent adhesion and easy parts removal
- Auto Resume Print from Power Outage
- High Quality Titan Extrusion to print Flexible filaments
- Suspended Spool(Filament) Holder
- Input Formats: .STL, .OBJ, .DAE, .AMF
- Ambient Operating Temperature: 8ºC – 40ºC
- Connectivity SD Card, USB Port (expert users only)
- Package Weight: 16.5kg
Package content
I’ve ordered the printer from the Anycubic official store on AliExpress. It arrived in the Netherlands from Czech republic in 4 days with DHL. Interestingly, since I’ve ordered the printer with two filaments included, the filaments arrived with a separate shipping, a day later. However, the printer had a few grams of blue filament, so I could test it in the first day.

Other than the printer, the package comes with a few accessories and spare parts. The most important is probably the replacement nozzle and the spare limit circuit. There is also an installation guide in English.
Installation
Installation is very easy since the printer has only two main parts: the base with the CPU and the Z-axis bar. There are three screws on each side to keep these two components together.
The most complicated step is probably the base levelling and calibration. The installation manual takes you to all the steps, but basically you need to lower the base (tide up the calibration screws) and take the nozzle to Z position. Then move the base and the nozzle manually back/forth and left/right to check the distance on the whole surface. As the manual says, use the provided paper inbetween the base and the nozzle to prevent scratches. When the printer is ON, the nozzle and the base do not move freely by hand, so you have to turn if OFF.
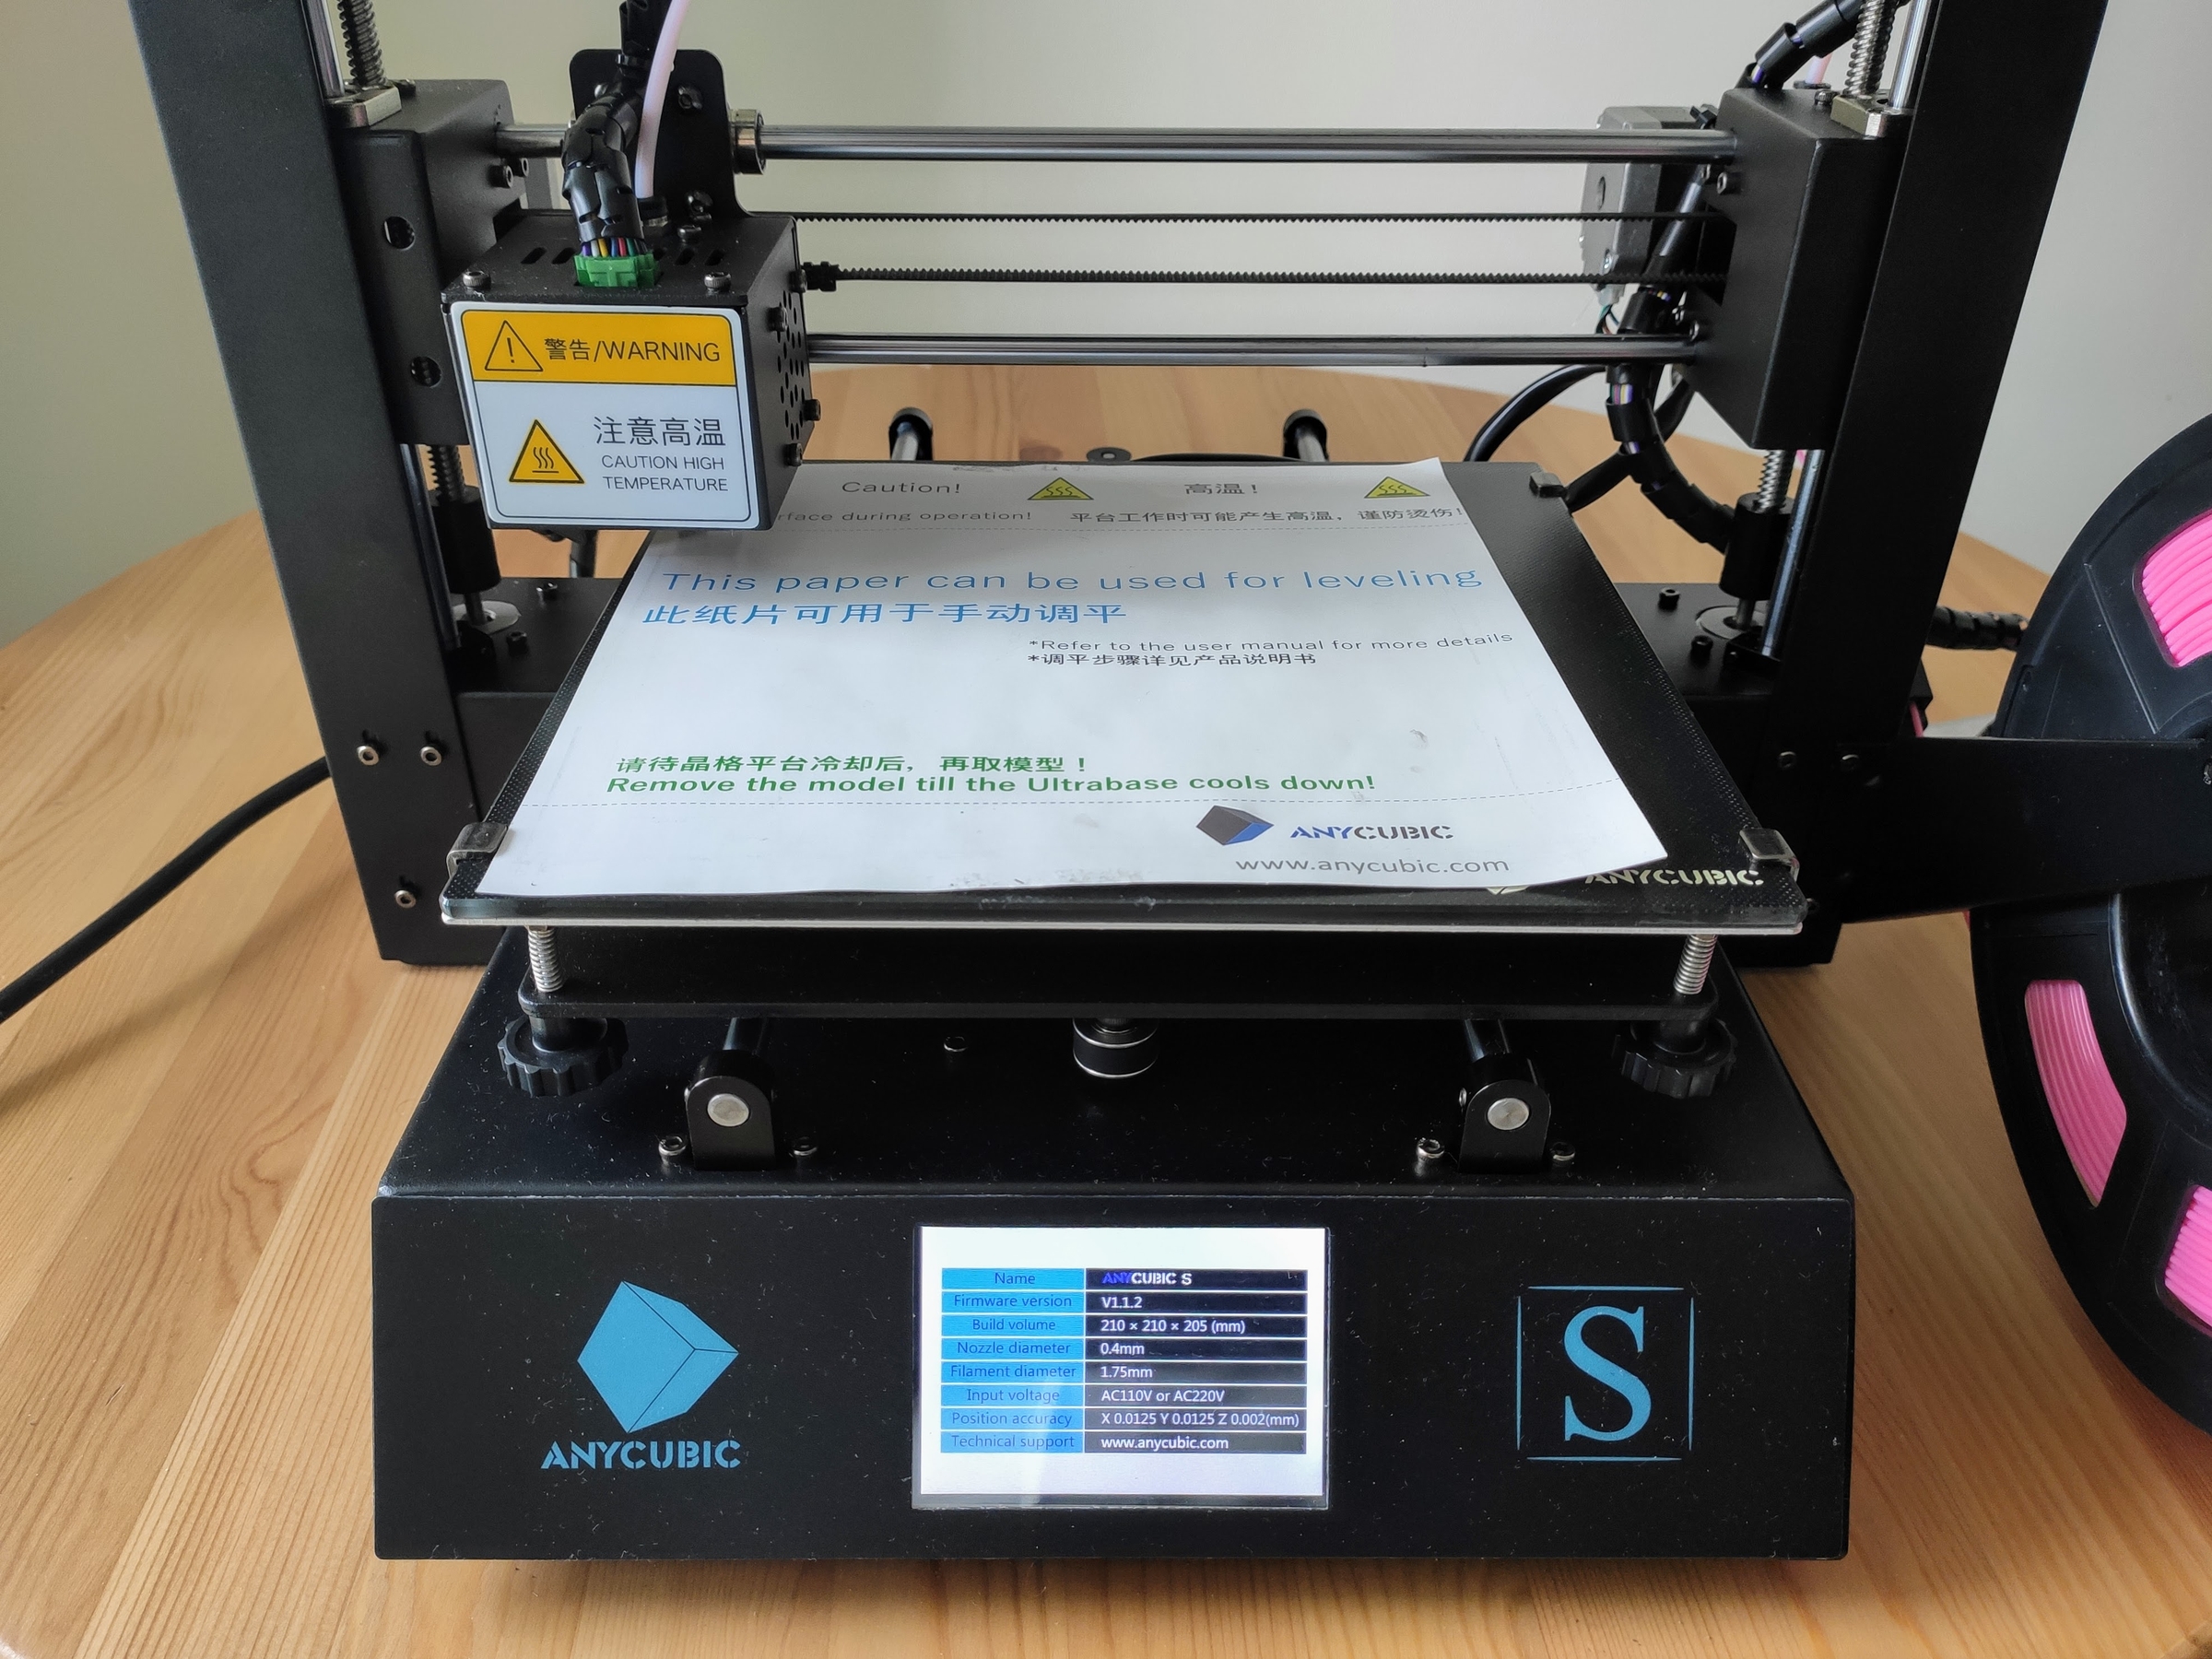
You want the distance between the nozzle and the base to be equal everywhere. As a guide, you should be able to move the paper on the base with a bit of friction. Very important is to lower your base midway before your calibration so you have space to adjust it.
As a last step, you have to insert the filament. Push it all the way through, until it gets to the nozzle.
Anycubic i3 Mega S firmware upgrade
As many people recommend, you should upgrade the firmware to Marlin 1.1.9 (the download link is on the top right corner). This new firmware comes with some cool features that you can find on the link. With the stock printer, you should use the hex file Marlin-Ai3M-v1.4.6-stock_drivers.hex.
I used Ultimaker Cura to upload the firmware and Pronterface to run the needed commands. Some commands do not return any answer, but that is fine.
You might think the firmware update is not working because the firmware version in the menu still says v1.1.2. That version is for the panel firmware and has nothing to do with the printer firmware. If you updated to Marlin, then you should see more functionality in the build menu.
First print
The printer comes with an SD card with the 3D model of two owls. This model will be enough to get you excited if this is your first printer and to check that your printer is calibrated properly and works fine.
After about one hour of printing, if everything goes fine, you will end up with the owl couple printed. The models will be very easy to unstick if the base is cold, so make sure to wait until the base cools down to about 30 celsius!
I think the quality is pretty good and considering that I have not done any adjustments or advanced calibration, so I am quite impressed by the result.
I’ve found the blue filament that came with the printer to be very dry and it broke by itself in multiple pieces when the temperature changed in my room. However, the two filament rolls that I’ve ordered are more flexible and work perfectly. Ideally, you should store your filaments in air tight bags with some a silica gel bags inside to absorb the humidity.
Conclusion
Considering that Anycubic i3 mega S is my first 3D printer, I am very pleased about the purchase. The other candidate I was looking at is Creality Ender 3 Pro, but after hours of online research I went for the mega S. There are plenty of comparisons online and from what I’ve read, these two are very similar in terms of capabilities, as well as price.
If you are planning to buy this printer, I recommend you to get the package with one or two filament rolls included. You basically get them at 50% price, so a very good deal.
Disclaimer: I have not been in contact with Anycubic about this article, nor I have been paid in any ways for writing this.