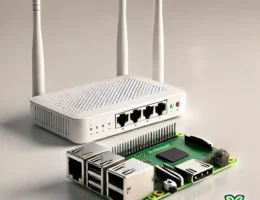
Setting up a Raspberry Pi without a monitor can seem challenging, but it’s actually a straightforward process if you know how to enable SSH and configure WiFi before booting. In this guide, I’ll walk you through the steps to prepare your Raspberry Pi for headless use, meaning you won’t need a monitor, keyboard, or mouse to get it up and running. All you’ll need is your Raspberry Pi, a microSD card, and a computer.
Prerequisites:
- Raspberry Pi (any model with WiFi capability)
- A microSD card (8GB or higher recommended)
- Computer with SD card reader (or use a microSD adapter)
- WiFi credentials (SSID and password)
- (Optional) Your SSH Public key
Install Raspberry Pi OS
The easiest way to enable SSH and WiFi on your Raspberry Pi is when you install Raspberry Pi OS. Here are the steps you need to follow.
- Download Raspberry Pi Imager: Go to the official Raspberry Pi OS download page and choose version for your OS.
- Run Raspberry Pi Imager: Select your version of Raspberry Pi and the OS version you want to install. I really recommend the Raspberry Pi OS Lite since it comes without desktop environment that you don’t need if you don’t have a monitor connected. You can install it later if you need it.


- Select your SD card and click Next
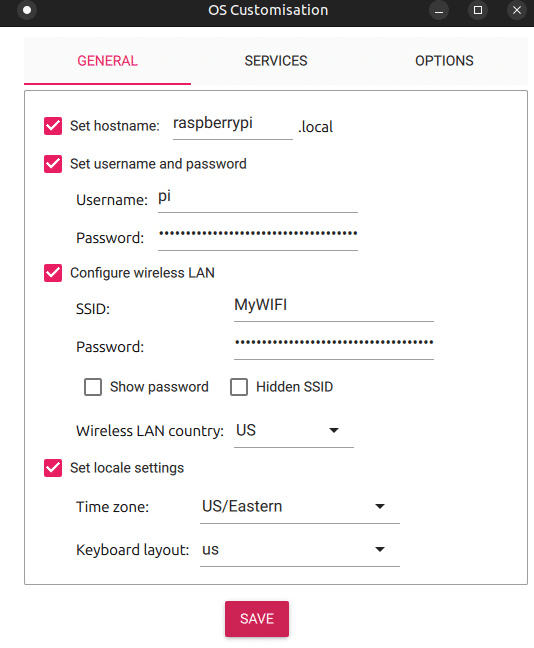
- Select customization: When asked if you want to apply customization, select Edit settings

- Customize:
- Set your hostname (you need to remember this one to be able to connect to your Raspberry Pi via SSH).
- Set your username and password (these will be used for SSH)
- Set your WiFi SSID and Password so your Raspberry Pi connect automatically to your WiFi network when it starts
- Set Wireless LAN country. This is used to enable WiFi bands based on your country
- DO NOT CLICK SAVE YET! Click on SERVICES
- Make sure Enable SSH is checked and select Use password authentication if you want to connect with username and password or paste your SSH Public key if you want to connect without username and password. If you select SSH Public key, password authentication is DISABLED!


- Burn image to SD card: Click SAVE and confirm you want to erase your SD card. The image then will be written to your Raspberry Pi SD card.
- Connect via SSH: Power your Raspberry Pi with the new SD card and now it should connect to your WiFi network and allow SSH connections
- To connect to Raspberry Pi run
ssh [email protected]. Make sure the username and the hostname corresponds to what you have set previously
- To connect to Raspberry Pi run
- Enjoy your Raspberry Pi!
By following these steps, you’ve successfully set up a Raspberry Pi for headless use, with SSH and WiFi enabled, all without needing to connect it to a monitor. This process is incredibly useful for projects where you want to tuck your Raspberry Pi away or if you don’t have access to peripherals like a keyboard or display. From here, you can start building, programming, or tinkering with your Raspberry Pi remotely!


